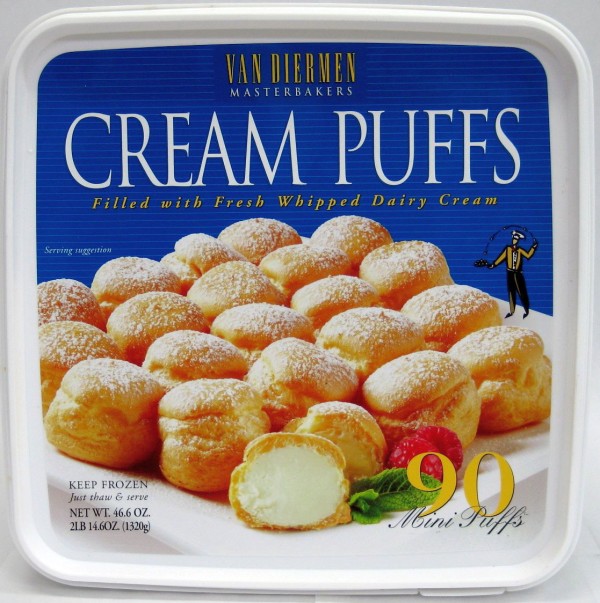
The first experience I ever had with profiteroles involved a frozen blue bucket from Costco. I remember the bucket would appear, magically, in the freezer and then vanish within a week not to be seen again for months.
The bucket was enigmatic. The bucket was intriguing. The bucket had a title, “Cream Puffs,” and a picture of what looked liked doughnut holes with an ice cream center. The bucket was also gigantic, at least as big as a watermelon. I remember being so captivated by the thought of a baked item being filled with ice cream. How did they do it? In my eight year old head, I imagined a kind of pastry wizard creating unmeltable ice cream, forming them into little balls, dipping them in doughnut batter (my eight year old self had no knowledge of doughs or batters, or the difference between the two), and then baking them in the oven for hours. These cream puffs were special. They were magical.
Of course, I was slightly disappointed when I was informed me that, in fact, the cream was injected into the already baked puff, in a semi-liquid state, and then hardened in the freezer. I tried to make do with the new facts. I re-imagined the pastry wizard into a kind of evil pastry surgeon, running around with syringes and injecting puffs and people alike. But it just didn’t have the same appeal.
I was likewise disappointed when I actually got around to eating one of the cream puffs. The texture that seemed most right to encase a delicious ball of ice cream was something soft, with a slight bite to it — something sweet and brioche-like. Instead, what I got was a tasteless, concrete-hard, eggy mess. It was appalling. I mistrusted my mom’s {the cream puff monger} dessert judgement from that day forth, favoring my dad’s more kid-friendly palate — mint chip ice cream, chocolate chip cookies, brownies.
Well, time flew, I went to college, studied abroad in France, and long story short, tried real profiteroles in a little café in Marseilles and was blown away. Lesson learned: never hold food grudges against an entire group of dessert because the Costco brand was less than impressive.
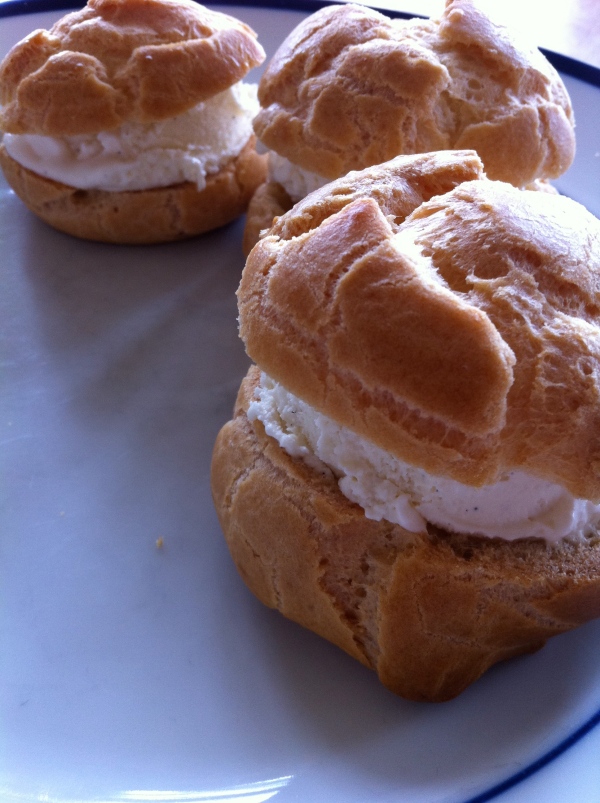
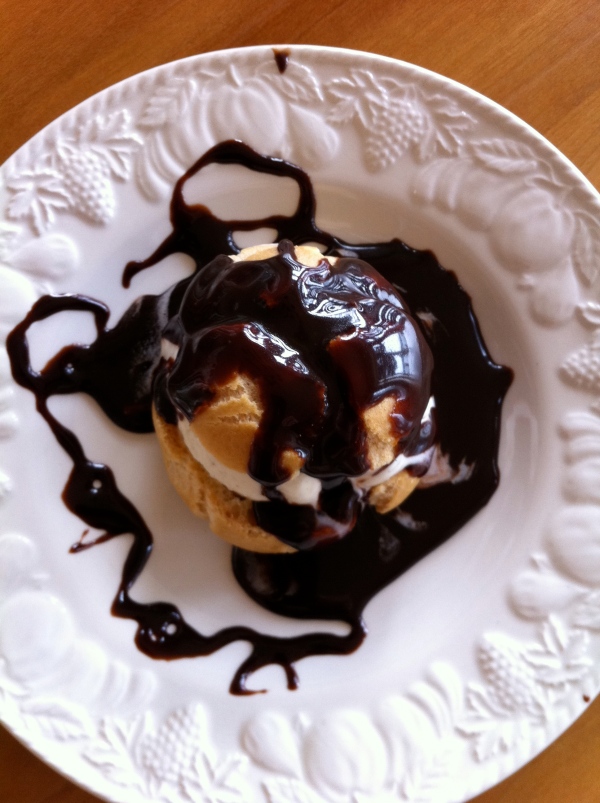
I decided to recreate a more rustic {rustic = not necessarily pretty} version of profiteroles…they are amazing with the traditional vanilla ice cream and chocolate sauce. I was super crazy lazy and only made the little choux balls, using store bought {Frans} chocolate sauce and {Breyers} vanilla bean ice cream.
Here is the recipe for choux!
1 pint water
3.5 oz butter
.5 oz sugar
.125 oz salt
9 oz bread flour
1 pint whole eggs
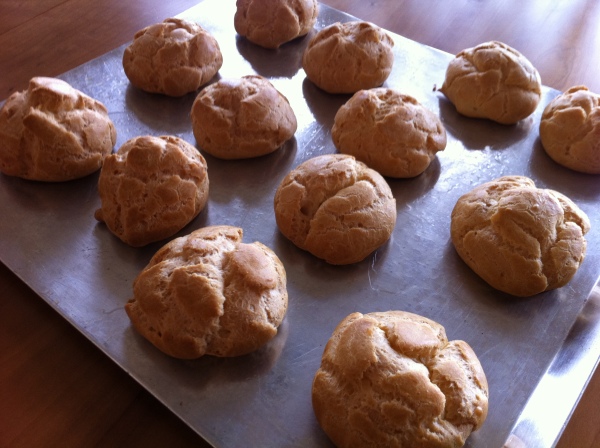
Bring the water, butter, sugar, and salt to a rolling boil in a large stainless steel pot. Turn off the heat and add the flour — stir vigorously with a large wooden spoon until flour no longer shows. Turn the heat back on, and continuously stir {with some degree of verve} until the dough is dryish — there should be a thin, crepe-like skin on the bottom of the pot, and the dough should pull away from the sides. Place the dough into a mixer, with a paddle, and mix until the bowl is no longer hot to the touch. Slowly add the eggs in, one at a time, and mix until incorporated. I like to let the dough rest about a half an hour before piping/baking…make sure you cover the surface with plastic wrap, though, or it will form a skin.
Pipe in whatever shape you desire — for profiteroles, small spheres are appropriate. You can also do what I did, which was slap some of the dough down on a baking sheet with a spoon — this creates a rougher, more textured puff than traditional pastry shops vaunt.
Bake in a convection oven at 350*F for the first 30 minutes, reduce to 300*F and bake for another 15 minutes.
Next up: Show-piece show-off
“These are the best peanut butter cookies you will ever shove down your gullet!” ~canyon~[allrecipes.com reviewer]
Ratings and reviews get me every time. Sit me in front of a recipe database, and I will, without hesitation, always arrange the recipes from the highest rated review to the lowest. I have an inherent faith in any review that has been vetted by 546 home bakers, and I will pretty much read every single review until I am satisfied that it really is a recipe that is worthy of my [not super precious] time.
Unfortunately, this Herculean confidence means that I also feel absolutely crushed when a recipe doesn’t turn out “superyummy ;)” or “omg nom nom nom!” or “THIS IS THE BEST BEST BEST COOKIE I HAVE EVER EATEN IN MY LIFE AND WILL MAKE YOU LOVE EVERYONE FOREVER.” In fact, I often begin to question my prowess as a confectionary whiz in general when the cookie doesn’t make me love everyone, forever, and then I begin to feel uncertain about my life choices.
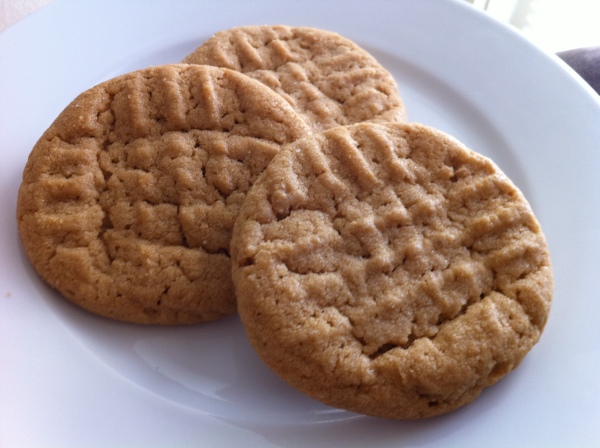
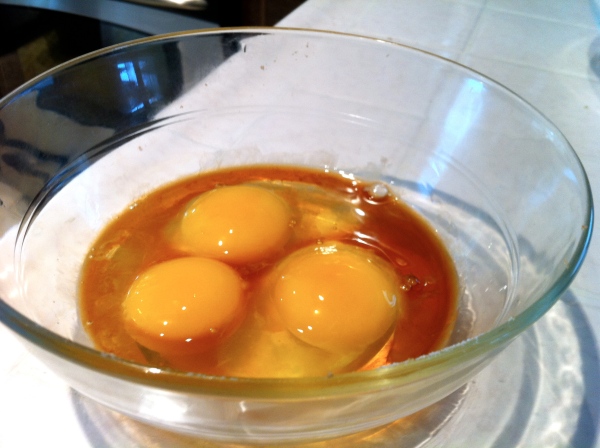
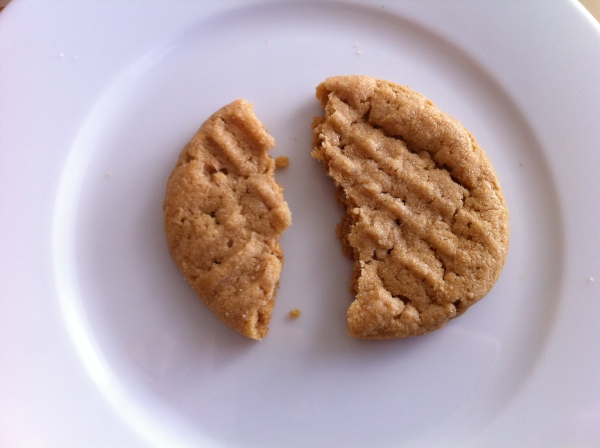
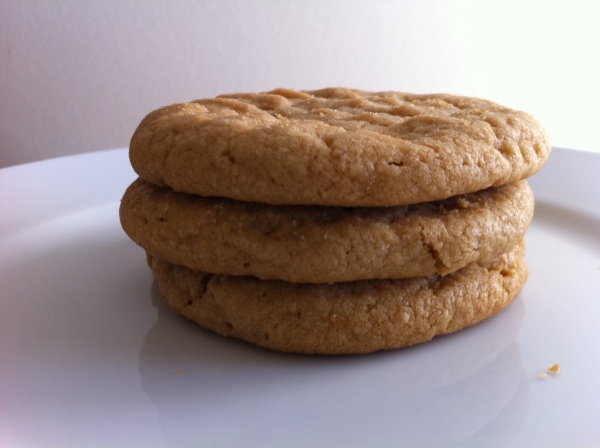
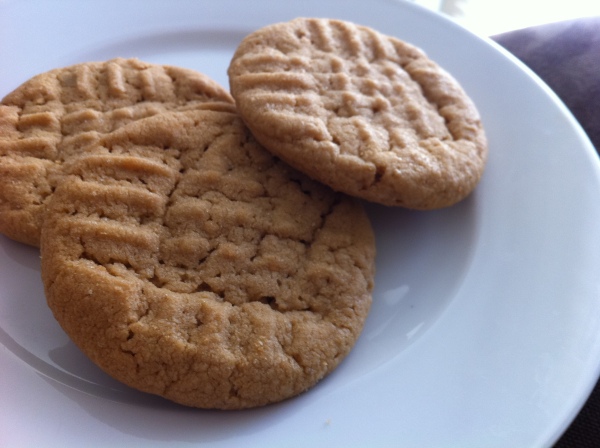
Thankfully, this doesn’t happen too often. Usually the recipe rated a 4.5 out of 5 possible stars, because it is actually very good. As you may or may not have guessed, I recently made some cookies from a user-generated recipe database, and they did not turn out exactly as I had hoped. Oh, they were very tasty, but they were not even close to the best peanut butter cookie I’ve ever had in my life. If you like soft, sweet, and rich, this is the cookie for you. If you like chewy, textured, and super peanut flavor, not so much. I should have guessed with the obscene amount of fat and that the description actually had the words “soft” and “creamy [?] ” to describe it. Literally, it melts in your mouth. But in a good way.
From Allrecipes.com, “The Whole Jar of Peanut Butter Cookies”
Here is a link to the original recipe.
I did not deviate (for the sole purpose that I could feel more victimized if the cookies did not turn out exactly as promised), but I did cut the recipe in half.
In case you are wondering, I did not feel victimized, but I did feel like I should have done a better job of processing the adjectives in the commentary.
Next up, can you guess which dough smells exactly like fake mashed potatoes?
Intermission
Right. So to show the world that I haven’t been wasting my winter away in a dark cave somewhere (not entirely untrue), I’ve decided to post pictures of the plated desserts I created this past quarter at pastry school.
It was very interesting to see the progression of plated desserts and the very distinct styles of each of my classmates as we, for the first time, received complete creative control over our creations from start to finish. I, for one, absolutely loved it. If I had to describe my own personal style, I would probably call it whimsical or playful, but clean and sharp. Whimsical with a purpose, if you will. Never whimsically haphazard mind you, but occasionally peculiar and capricious.
So without further ado, here is Sara’s 4th quarter at pastry school!
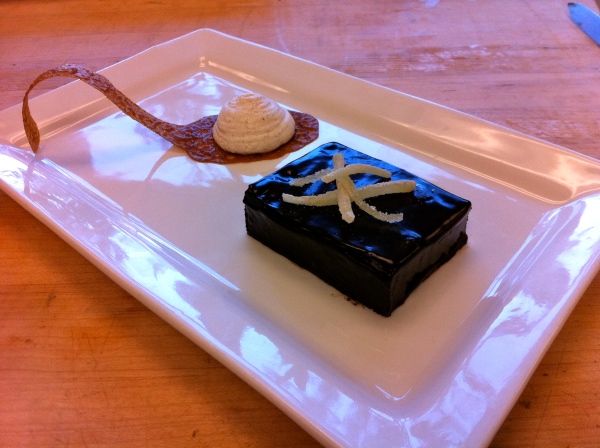
Ginger Brownie Love; rich, spicy, warm, autumnal
My favorite, as far as flavor goes. A dense chocolate fudge brownie with bits of candied ginger throughout, covered with poured gananche and topped with sliced candied ginger. Served with a molasses tuile spoon (you don’t even want to know how many of the handles I broke or how many swear words flew out of my mouth while forming those little miscreants) and a spiced whipped cream.
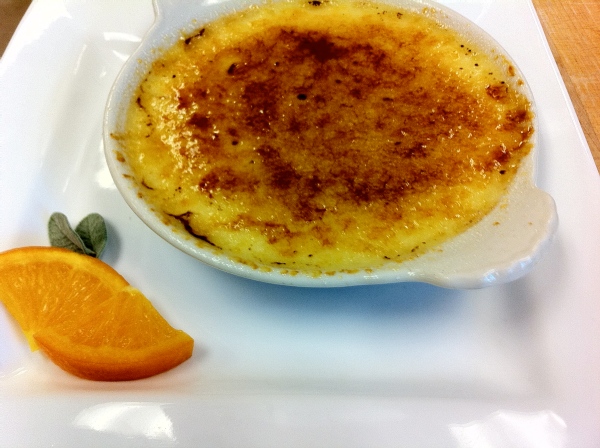
Orange Cardamom Creme Brulee; caramelized, delicate, citrus, aromatic
The most traditional. A standard creme brulee recipe with added cardamom orange flavor. Except for the fact that it didn’t really turn out cardomom-y or orange-y. Note to self, and all other: you really really need to infuse flavor to get the full impact. It fell short of what I wanted, but it still had a very good texture and flavor.
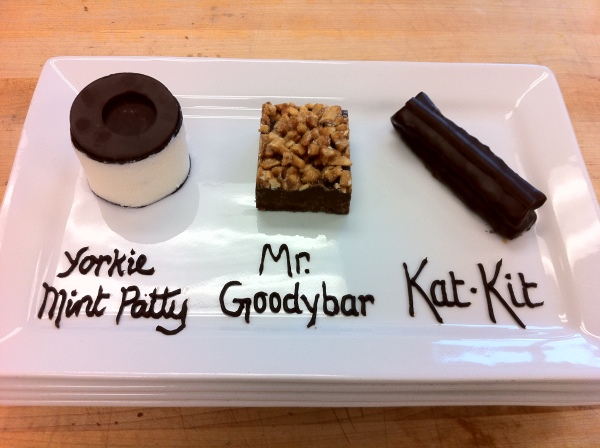
Candybar Trio; decadent, nostalgic, chocolate, varied
Probably my most inspired. I loved the way this turned out. From left to right, mint bavarian sandwiched between dark chocolate couverture, chocolate fudge candy with salted honey roasted peanuts on top, puff pastry coated in semisweet chocolate. The fudge with honey roasted peanuts on top tasted like heaven, and induced the same reaction as crack. There was a half a sheet pan extra, and the students who sampled it came back for seconds, thirds, fourths, and stood with tear-filled eyes, shaking violently, offering money, future children and limbs if I agreed to sacrifice the fudge actually reserved for customers. It was sad.
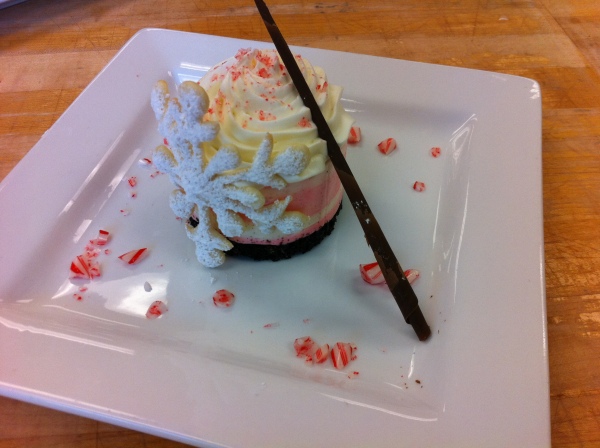
Candycane Frost; bright, creamy, fresh, festive
Absolutely, the most adorable. A peppermint mousse (layered in pink, white, pink, white, etc.) with a chocolate cookie crumble base and a light vanilla whipped cream. Served with a snowflake tuile cookie, and garnished with crushed candycane and a chocolate cigarette. As you might guess, this was done near the holidays.
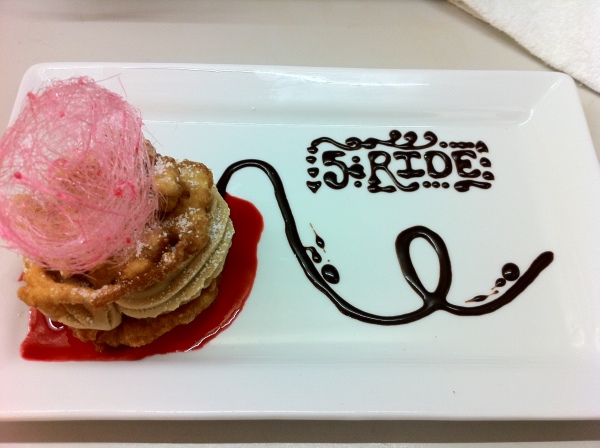
Carnival Fare; fanciful, sweet, salt, crunch
Certainly the most fun to execute. This was my last dessert and I decided to go all out, thematically. “Carnival Fare” is two mini funnel cakes sandwiching piped salted caramel ice cream on top of a raspberry sauce and topped with spun sugar ‘cotton candy.’ Chocolate ganache piped on the plate mimicking old-time carnival signs and an abstract roller coaster. It sounds like a lot going on, but holy cow, when you tasted everything together, it was literally like a little state fair lighting up in your mouth.
Next up: A post that will not take 4 months to post. I’m shooting for a week…
“This wasn’t just plain terrible, this was fancy terrible. This was terrible with raisins in it.” Dorothy Parker
Growing up, I was always baffled at bread pudding.
I originally visualized it as some kind of actual bread loaf, made with pudding. Or maybe bread, ribboned with a pudding filling. At any rate, I imagined the pudding part coming into play before the loaf of bread was baked. And that didn’t sound so bad; actually it sounded pretty good.
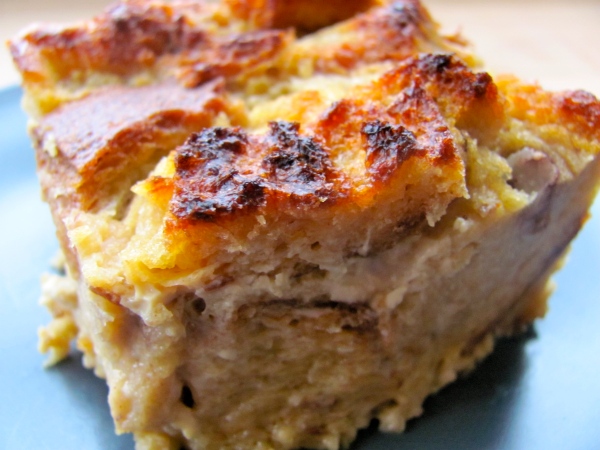
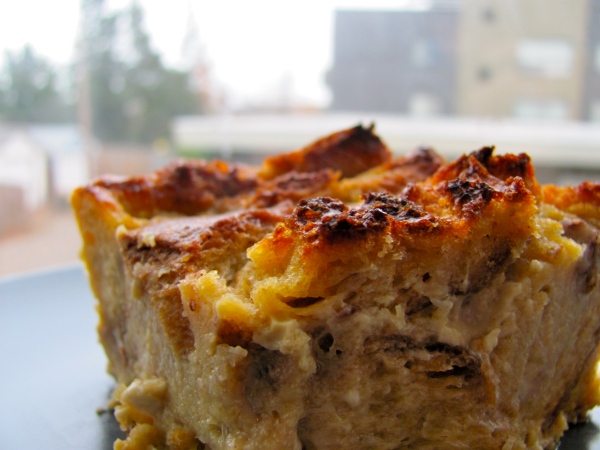
When I actually found out that bread pudding was a dish of already baked bread cut up into cubes and soaked until soggy, and then baked (frequently with loathsome raisins), I was simultaneously disgusted and disturbed. Soon after I saw a picture of bread pudding, and consequently, bread pudding became something I avoided at all costs.
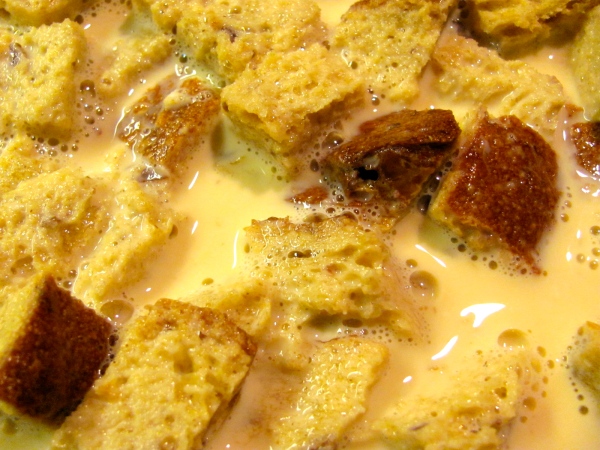
You see, bread pudding is not pretty. Despite the best efforts of many a talented pastry chef, most bread puddings turn out looking repulsive. At its best, it looks like soggy pieces of bread cemented with snail ooze. At its worst, it looks like something my cat yakked up on the carpet. Either way, it was hardly something that I ever chose to eat.
That is, until my parents’ next door neighbor baked some bread pudding for my family, while I was home for a holiday break from college. My parents’ neighbor is a sweet, sweet elderly lady, who always greets me with a pleasant smile of recognition whenever she sees me, though I’m often convinced that every person who currently lives on my childhood block actually mistakes me for my sister, my aunt, my cousin, and/or my mother. But for some reason, I always imagined her to intuitively know who I was, despite my infrequent visits home. Little did this kind-hearted woman know that I had actively avoided bread pudding for my entire adult life, up until this point.
“Try it,” my father urged. “Its really good. Just avoid the raisins.”
Just avoid raisins. Right. Not only did this offering have all of the visual appeal of semi-digested used tissues, it was also riddled with raisins. I made a face. I stalled. I explained that I had just been to the dentist, and it would be counterproductive to eat any dessert, ever. All to no avail:
“Oh come on, Sara…its not the end of the world, and it would make her so happy if you went over and let her know how much you enjoyed it.”
I considered the option of lying to her face, and sighed in resignation. I can’t lie very well, especially not to the faces of sweet elderly neighbor-women who bake things for my family. So I girded my loins, and dove in (metaphorically, of course. I actually tentatively used a teaspoon to isolate a raisin-less segment, and hesitantly nibbled.)
As soon as the bread pudding was in my mouth, my tongue and brain did a mental high five. It was delicious. Amazing. Texturally miraculous. I couldn’t believe it. At that point, I made the decision to go ahead, and spend the amount of time it would take to pick out every single raisin, so that I could enjoy my bread pudding in huge, velociraptor-style chomps.
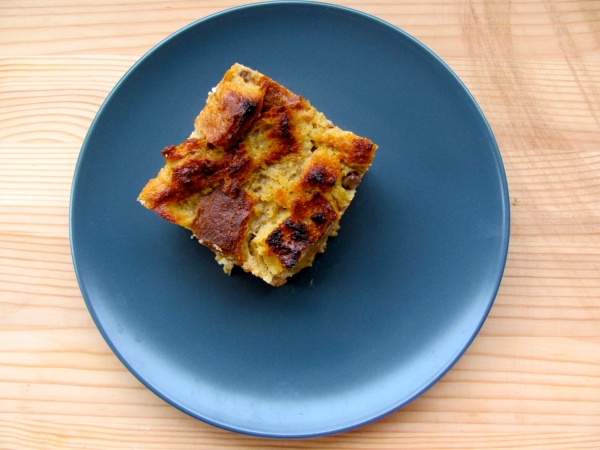
The bread pudding recipe that I’ve posted today, does not live up to the life-revelatory flavor and texture of the first bread pudding I’ve ever loved, but it is very, very good.
From Dorie Greenspan’s Baking, from my home to yours. (Sara’s lazy and “what she happened to have in the pantry” modified version, in parenthesis.)
BOURBON BREAD PUDDING
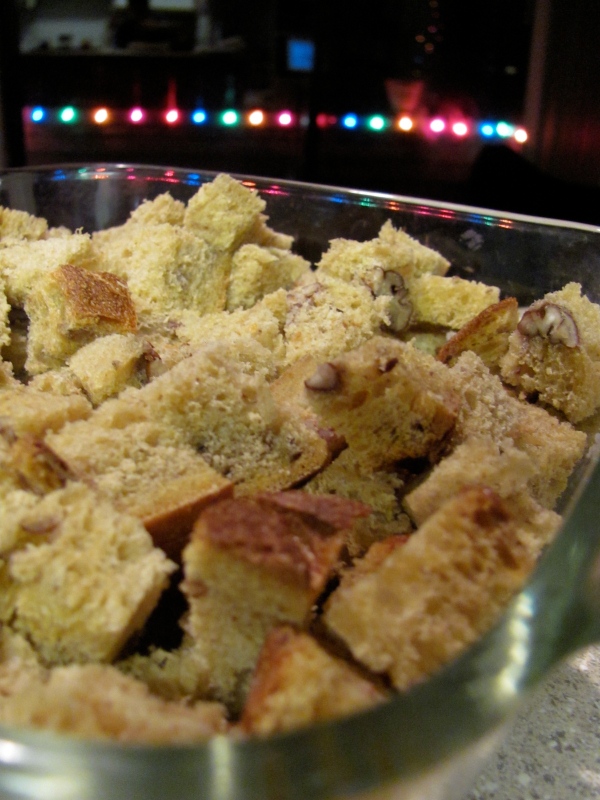
- 8 oz baguette, or egg-rich bread, preferably stale (I used a Sweet Potato-Pecan Bread)
- 1.5 cups whole milk (1 cup lowfat milk)
- 1.5 cups heavy cream (2 cups half and half)
- 4 large eggs (3 large eggs)
- 2 large egg yolks
- .5 cup sugar (brown sugar)
- .5 teaspoon ground cinnamon (1 teaspoon of pumpkin pie spice)
- Pinch of freshly grated nutmeg (omitted)
- 1.5 teaspoons pure vanilla extract
- 1 tablespoon bourbon (okkkk, maybe 2ish?)
- .125 teaspoon pure almond extract (omitted)
Have a nonreactive 9×5 loaf pan on hand (used a 8×8 square baking dish), as well as a roasting pan big enough to hold the loaf pan. Line the roasting pan with a double thickness of paper towels. Fill a teakettle with water and put it on a boil; when the water boils, turn off the heat.
Cut the bread into one inch cubes. If the bread is stale, put it in the loaf pan. If it is not stale spread it on a baking sheet lined with parchment paper and bake in a 350 degree oven to “stale” it for 10 minutes, then put it in the pan.
Bring the milk and cream just to a boil.
Meanwhile, whisk the eggs, yolks, sugar, cinnamon and nutmeg together in a bowl. Still whisking, slowly drizzle in about a quarter of the hot milk mix — this will temper, or warm the eggs so they don’t scramble. Whisking all the while, slowly pour in the remaining milk. Add the bourbon and extracts, and whisk gently to blend. Rap the bowl against the counter to pop any bubbles that might have formed, then pour the custard over the bread and press the bread gently with the back of a spoon to help cover it with liquid. Cover the pan lightly with wax paper and leave it on the counter, giving the bread the back-of-the-spoon treatment now and again, for an hour.
Center a rack in the oven and preheat to 350.
Discard the wax paper and cover the pan snugly with a piece of aluminum foil; poke about 5 holes. Slide the pan into the oven and very carefully, pour enough hot water in the pan to come halfway up the sides of the pudding pan. Bake the pudding for a half hour, then remove the foil and baking for about fifteen minutes more, or until the pudding is puffed and golden and a knife inserted deep into the center comes out clean. Transfer the baking pan to a rack and cool the pudding until just warm.
Next up: Sara’s most insatiable craving…
“There are two kinds of people in the world: those who love chocolate, and communists.” Leslie Moak Murray
I am very well aware of the fact that many people believe apple pie to be the quintessential all-American dessert. Many would say that there’s nothing better than a hot, flaky-crusted, cinnamon-infused apple pie fresh from the oven. Normally I would not be disinclined to agree. Pie is delicious. However, just this once, I am going to be wholly irreverent and say I disagree. I disagree, and I give my support to the moist, fudgy chocolate cake as a contender for the all-American classic dessert.
Here are my reasons:
- Chocolate is a uniquely American ingredient (true, it is more of a Central American ingredient; all the same it is specifically indigenous to the Americas…unlike, say, apples..ahem Western Asia.)
- Chocolate cake is used as a celebration cake year round, across all generations. Kids love chocolate cakes, elderly folks love chocolate cake, etc. It is truly versatile, unlike apple pie which is usually made during a specific season and usually for a specific couple of holidays.
- According to Leslie Moak Murray, people who dislike chocolate (and by extension, chocolate cake) are communists, and the US does not currently support a communist government, ergo, if you love chocolate, you love America.
- Chocolate cake, I think, also embodies the American spirit. It is bold, rich (culturally, of course), and can be waaaaay over the top in terms of size. It is warm, and comforting, sweet and full-flavored. Pair it with a glass of milk (cow, soy, almond, lactose-free, or any other variety, according to the American standard of freedom of choice) and you are ready to feel some warm fuzzies.
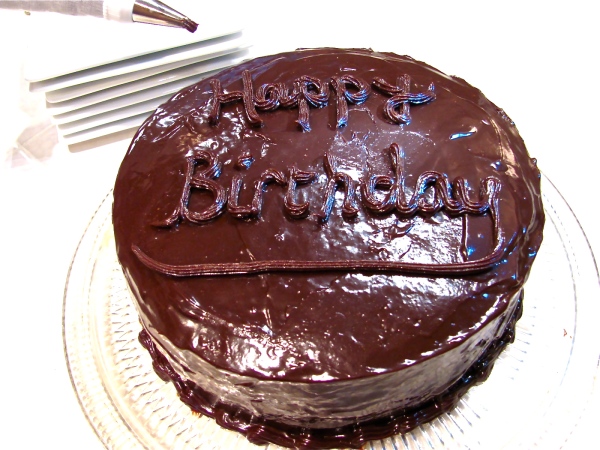
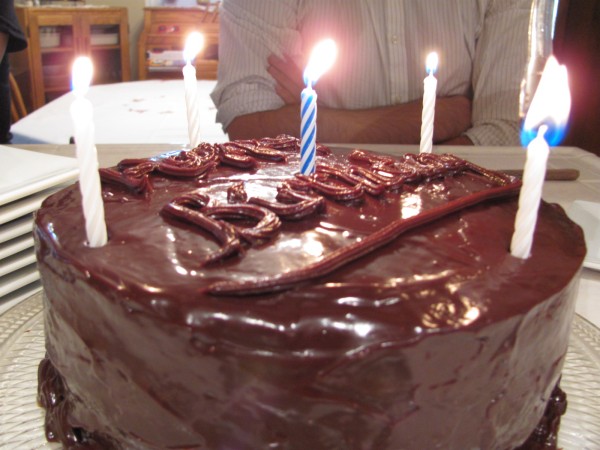
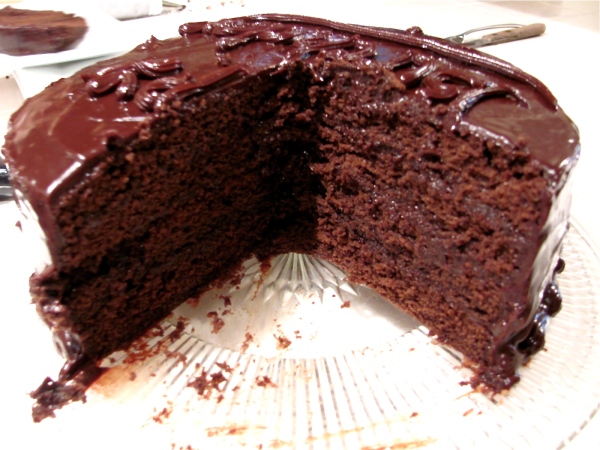
And the warm fuzzies are really what its all about. My dad’s birthday passed recently, and he wanted nothing more than a big chocolatey-chocolate cake. So I delivered this gem, courtesy of Rose Levy Beranbaum’s “Cake Bible.”
Ms. Beranbaum does an amazing job of describing the process of cake making and baking, so I highly suggest you buy her book if you are seriously into cakes, or even just kind of into cakes and want to make some really delicious ones. She also writes up gloriously detailed flavor profiles – she describes her Chocolate Fudge Cakes as “soft and light yet moist with good chocolate flavor impact and a lingering bittersweet aftertaste.” Super.
Chocolate Fudge Cake
- 3 oz or 3/4 cup + 2 tablespoons unsweetened Dutch-processed cocoa
- 12.5 oz or 1 1/2 liquid cups boiling water
- 3 large eggs
- 1 1/2 teaspoons vanilla
- 10.5 oz or 3 cups sifted cake flour
- 15.25 oz or 2 cups firmly packed brown sugar
- 2 1/4 teaspoons baking powder
- 3/4 teaspoon baking soda
- 3/4 teaspoon salt
- 8 oz or 1 cup softened unsalted butter
Preheat the oven to 350*F. Prep two 9-inch by 1 1/2-inch cake pans, greased, bottoms lined with parchment or wax paper, and then greased again and floured.
In a medium bowl, whisk together the cocoa and boiling water until smooth. Cool to room temperature.
In another bowl, lightly combine the eggs, 1/4 of the cocoa mixture and the vanilla.
In a large mixing bowl combine the remaining dry ingredients and mix on low speed for 30 seconds. Add the butter and remaining cocoa mixture. Mix on low speed until the dry ingredients are moistened. Increase to medium speed (high speed if using a hand mixer) and beat for 1 1/2 minutes to aerate and develop the cake’s structure. Scrape down the sides AND bottom of bowl. Gradually add the egg mixture in 3 batches, beating for 20 seconds after each addition to incorporate the ingredients and strengthen the structure. Scrape down the sides AND bottom of bowl.
Scrape the batter into prepared pans and smooth the surface with a spatula. The pans will be about 1/2 full. Bake 20 to 30 minutes or until a tester inserted near the center comes out clean and the cake springs back and pressed lightly in the center.
Let the cakes cool in the pan on racks for 10 minutes. Loosen the sides with a small metal spatula and invert onto greased wire racks. To prevent splitting reinvert so that the tops are up and cool completely before wrapping airtight.
Dark Chocolate Ganache, Filling, Frosting, and Sauce
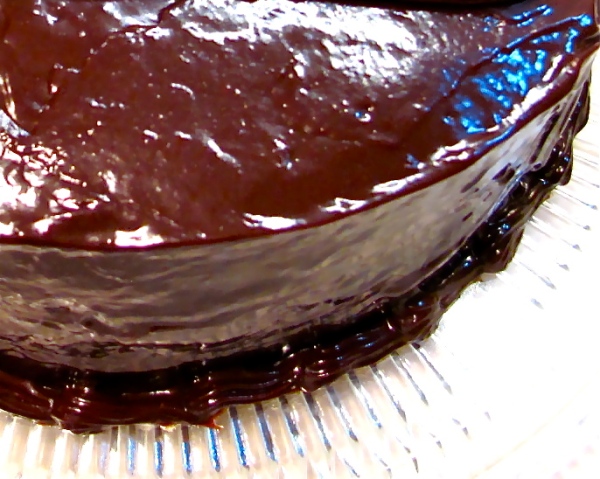
I used this recipe, again from Ms. Berenbaum’s book, to fill and frost the cake. It definitely makes a very very rich chocolatey cake – I’m going to go ahead and say that this fudge cake and dark chocolate ganache makes one of the best all-American butter chocolate layer cakes I’ve ever tasted. Also – though the butter is optional in the recipe, it really isn’t. Add it.
- 12 oz bittersweet chocolate
- 13.5 oz or 1 2/3 liquid cups heavy cream
- 2 oz or 1/4 cup unsalted butter, softened (not) optional
- 1 oz or 2 tablespoons Cognac
Break the chocolate into pieces and process in a food processor until very fine. Heat the cream to the boiling point and, with the motor running, pour it through the feed tube in a steady stream. Process a few seconds until smooth. Transfer to a bowl and cool completely. Gently stir in the butter and Cogac. Allow to cool for several hours until of frosting consistency (if you try to put it on a cake now, the cake will just absorb…which makes another kind of deliciousness, but not a true filling). Whisk for a few seconds to aerate. The color will lighten, slightly.
**If you don’t have a food processor or hate pulling the processor out of its hiding place and then cleaning the 14 part attached to it like me, you can just chop up the chocolate finely with a chef’s knife and a cutting board and throw all the pieces into a large bowl. Pour the boiling cream over the chocolate and don’t touch it for two minutes. Take a whisk and gently agitate, until the chocolate is integrated, and add the butter and Cognac. Give it a little more muscle, until the ganache is lovely and SHINY. Let cool.
Up next: Some wild and crazy yeast
“Deep summer is when laziness finds respectability.” Sam Keen
Well, kind of. Unfortunately, it is no longer deep summer and I no longer have any excuse for my blogging laziness.
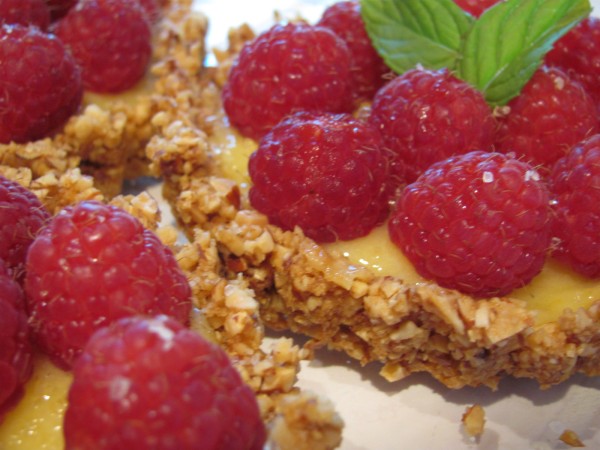
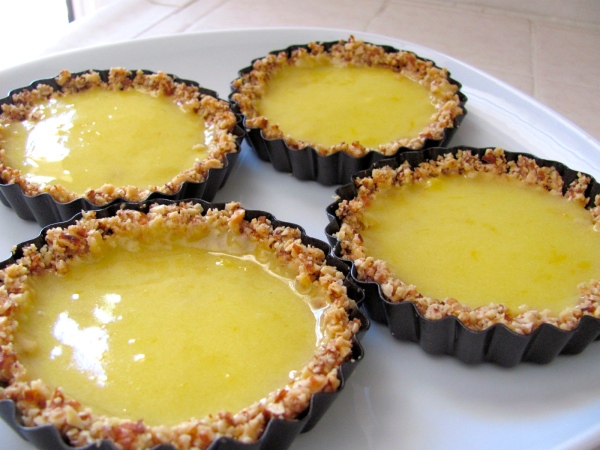
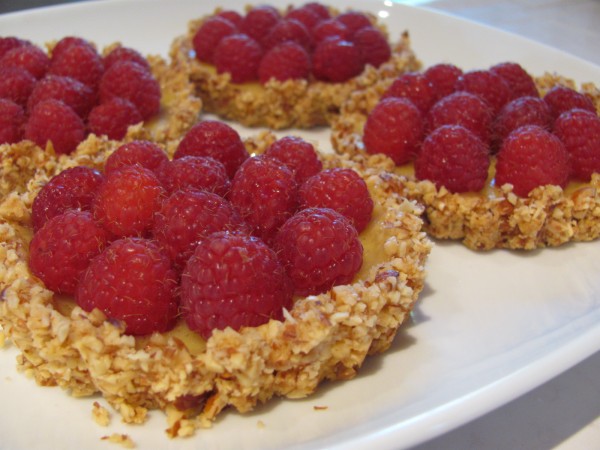
Well, perhaps a small excuse – I was down in California again for a period of time, and although the Seattle has firmly decided that we are now in the throes of autumn, LA continues to barrel through with summertime heat, completely heedless of October lurking around the corner. In celebration of this blithe attitude towards the calendar, I decided to make some Raspberry Lemon-Curd Tartelettes. Tartelettes are one of my favorite forms of dessert and I don’t make them nearly as often as I should. They’re compact and very shareable, they have a higher crust to filling ratio (which is excellent), and they bake up much quicker than a traditional tart. All of these factors contribute to my vast enjoyment of tartelettes – after all, what is a tartelette but a mini-pie? And I love pie.
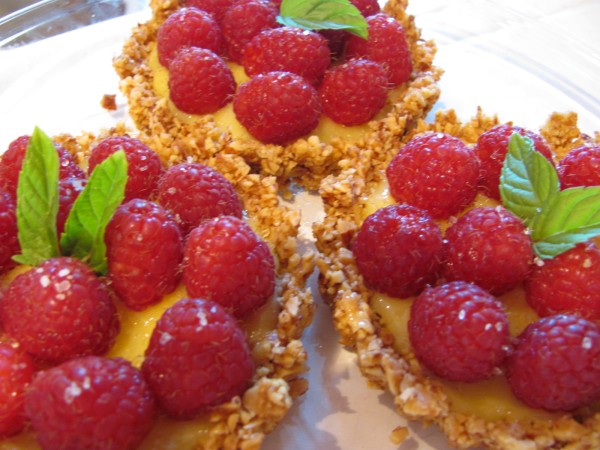
I don’t think there are many flavor combinations that are more quintessentially summer than creamy sweet lemon and fresh raspberry. Add a crunchy, lightly sweetened toasted almond crust and a sprig of mint, and that’s it. That’s just it.
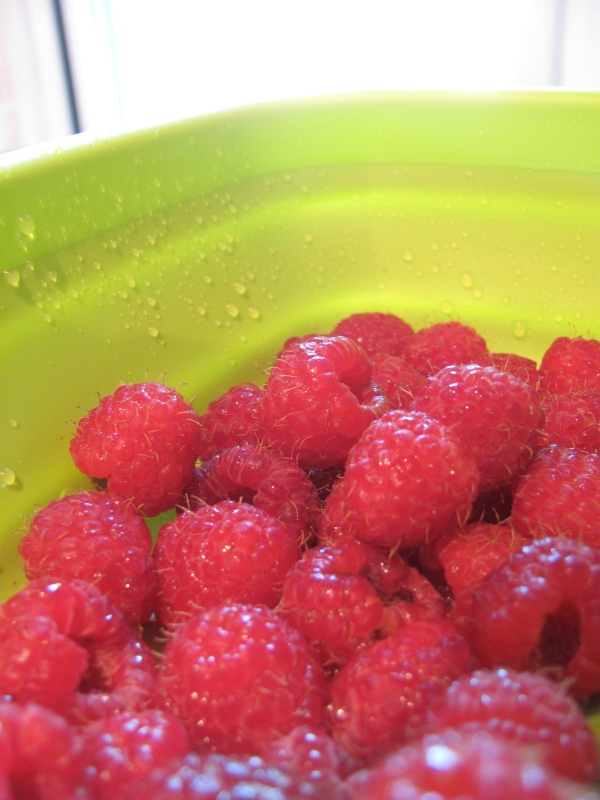
At any rate, the raspberries were on an insane sale at only $2 a box and I felt obligated to give them a happy home. Actually I’m not sure if these tartelettes would have existed at all if the raspberries had cost $6 a box, because lets be honest, when you pay that much for fresh fruit you feel some sort of terrible obligation to eat and enjoy it as is, without any meddling. And with raspberries, you count yourself lucky if a fourth of the box hasn’t molded over, or gone beyond mushy.
At any rate the tartelettes turned out just lovely, and super tasty; and now with this summertime success behind me I can cozy up into more autumnal fare in the near future.
Raspberry Lemon-Curd Tartlettes
This “recipe” is like most of my baking – a mash-up of several recipes from several authorities.
Toasted Almond Crust
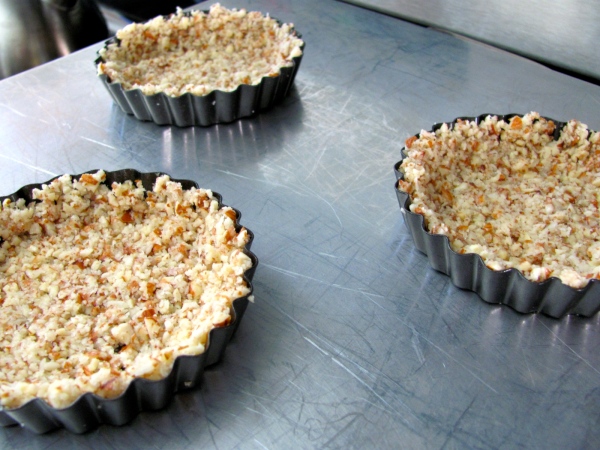
- 2 cups raw chopped almonds (I very roughly chopped by hand – a conscious decision to make the crust a bit more rustic, with a bigger crunch. If you want a more traditional crust texture, use a food processor to chop it fairly fine; be careful though, if you take it too far, it’ll turn into almond butter)
- 1/4 cup sugar
- 5 tablespoons melted butter
Mix everything in a bowl together, then press the crust mixture into the tartelette molds. Bake at 350*F until the almonds are toasty and golden, or about 12 minutes. Let cool on a wire rack before pouring the lemon curd in.
Lemon Curd (Rose Levy Berenbaum The Cake Bible)
- 4 large egg yolks
- 4.5 oz sugar
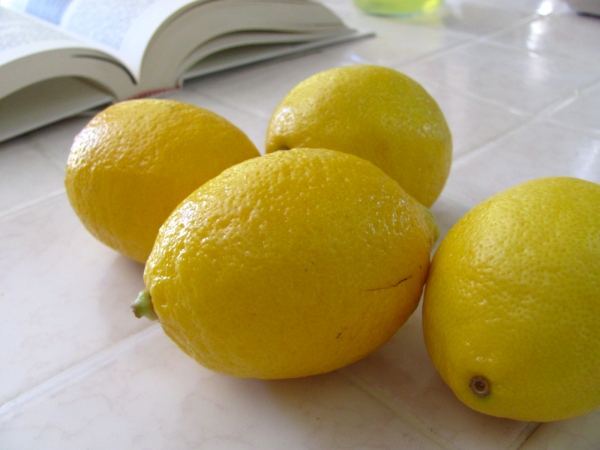
- 3 fl.oz lemon juice (about 2 1/2 large lemons)
- 4 tablespoons unsalted, softened butter
- pinch of salt
- 2 teaspoons finely shredded lemon zest
In a heavy noncorrodible saucepan, beat the yolks and sugar until well blended. ( I always do this over a double-boiler; its just easier for me to control the heat and lessens the chance of curdling). Stir in the remaining ingredients except the lemon zest. Cook over medium-low heat, stirring constantly until thickened and resembling a thin hollandaise sauce, which thickly coats a wooden spoon but is still liquid enough to pour. The mixture will change from transluscent to opaque and begin to take on a yellow color on the back of a wooden spoon. Do not let it boil, or it will curdle! (Again, double-boiler is awesome.) When the curd has thickened, pour at once into a strainer. (I skipped this step). Stir in the lemon zest and cool. While still warm (but not hot!) pour the lemon curd into the almond crusts and let sit in the refrigerator until set, about 30 minutes.
After 30 minutes, pull out the tartelettes and very very very very carefully unmold (no, but seriously, be gentle). Place washed and dried raspberries on top of the tartelette and garnish with mint and coarse sugar, if desired.
Enjoy with a mojito, margarita, or even some ice cold water.
Up next, the most chocolate of cakes.
“All well-regulated families set apart an hour every morning for tea and bread and butter.” -Joseph Addison
But spectacular families set apart time for wine and samosas and cake.
At the recent family reunion, we not only set time apart, but devoted three whole days to consuming delicious food, and, of course, spending time with each other.
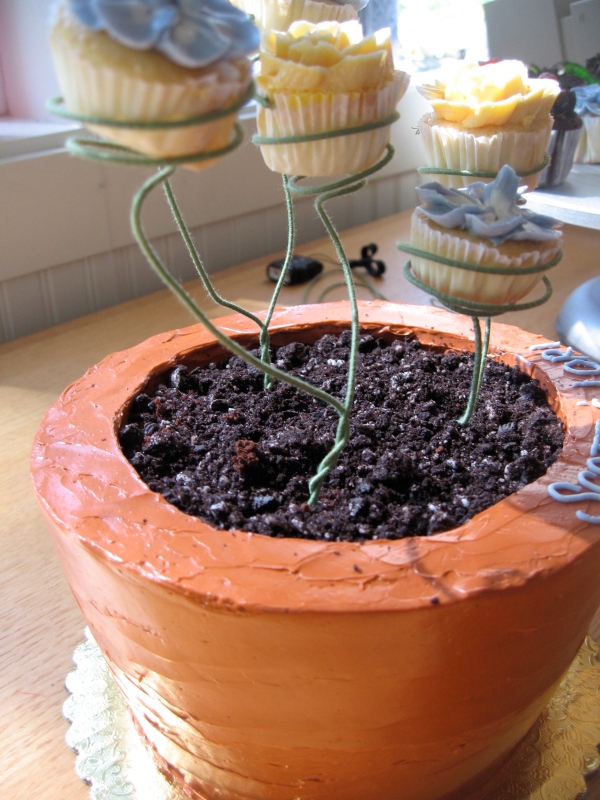
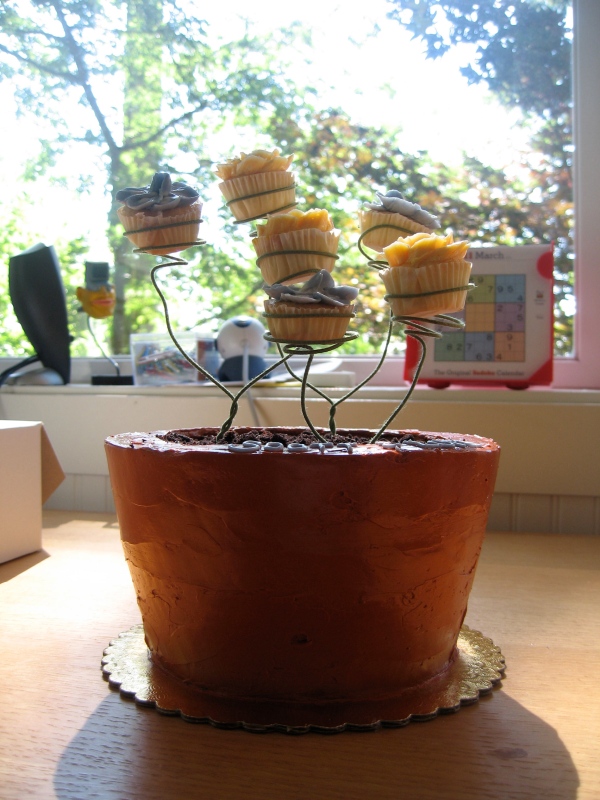
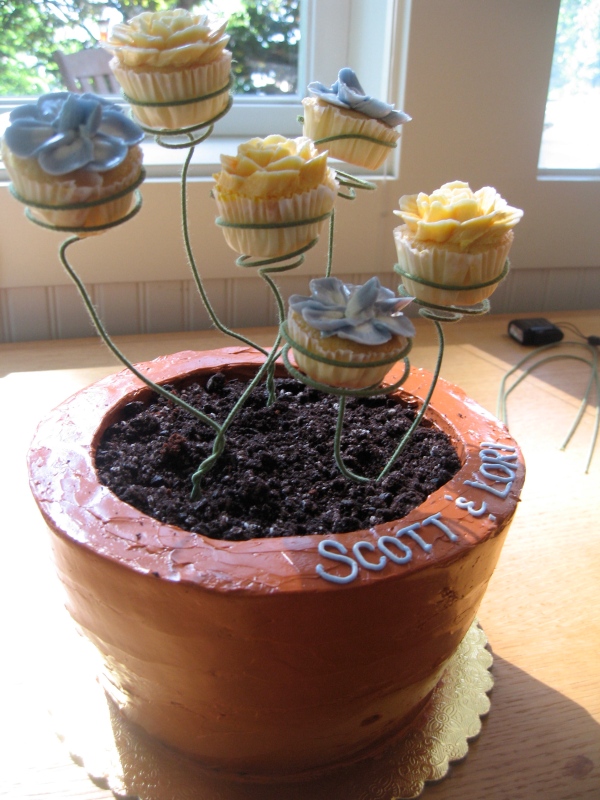
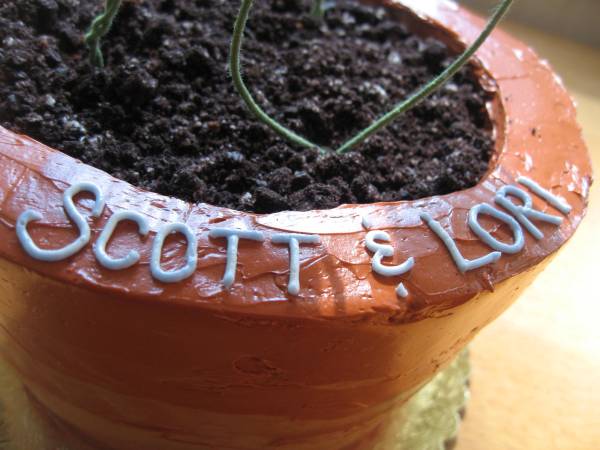
This particular family reunion I was presented with the opportunity to create a post-wedding celebration cake for my uncle and his new bride who had gotten married a couple of weeks previous to the reunion. I thought of surprising the couple with a three tiered hunk of vanilla flavored cake matter, but decided that if it were me, I would want input. So, I asked my uncle some basic questions, and I’m glad I did because it turned out that they wanted nearly the exact opposite of what I was planning to do. They were perfectly undemanding, were adamant in stating that I had complete creative control, but I finally wrung some details out of my uncle – namely that they preferred non-traditional (i.e. not tiered), loved chocolate, and that his new wife loved to garden. And so, I decided, Flowerpot Cake.
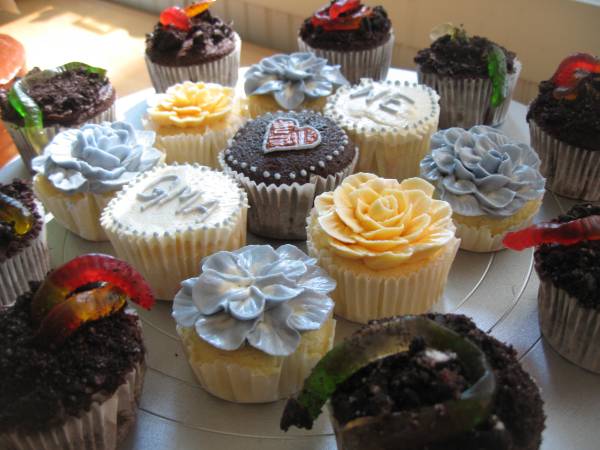
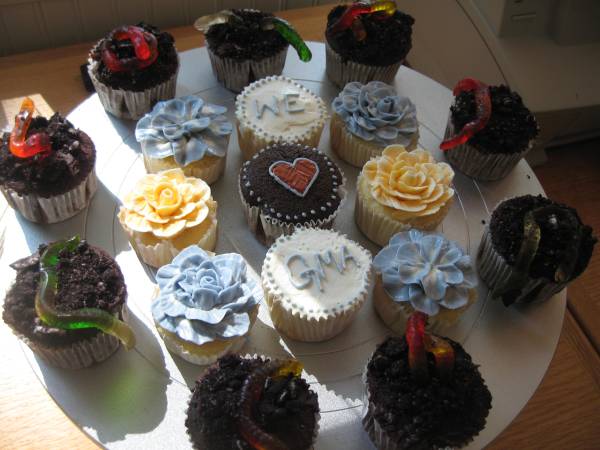
In addition to the newly wedded couple’s cake, I decided to make a little cupcake display for my grandma, as her birthday was one of the (many) reasons for the family reunion. I wanted to tie the cake and the cupcakes together in a fun way because my grandma is a fun lady. So, since the Flowerpot Cake had little miniature flower cupcakes, I interspersed some of those with a couple of chocolate cupcakes with worms bursting out of crumbled cookie earth. Grandma (and the 3 & 5 year old boys present) loved it.
I had been meaning to attempt something like this for awhile — the idea of a layered cake pot with mini flower cupcakes was too appealing to resist for long. And so armed with a spatula (the better to scrape your bowl with), and heaps of butter, I joyfully entered the fray.
The Nitty-Gritty Construction Details of the Flowerpot Cake
I used a very basic chocolate cake (really any sturdy-crumbed chocolate cake will do) for the flowerpot and for the wormy cupcakes. I made 2 6-inch and 2 7-inch rounds and filled cupcake pans with the remaining batter. I then made a small batch of lemon chiffon cake for the flowerbuds (but again, any light vanilla, lemon, etc. cake will do) and filled a mini-cupcake pan.
To construct the flowerpot, I split each of the cake layers in half. I then started with 1 of the 7-inch cakes on the bottom and layered cake with dark chocolate ganache and cake all the way up (reserving one of the 1/2 7-inch rounds). I layered it on a cardboard cake round. So it went like this (from bottom to top):
Half 7-inch cake Ganache Half 7-inch cake Ganache Half 6-inch cake Ganache Half 6-inch cake Ganache Half 6-inch cake Ganache Half 6-inch cake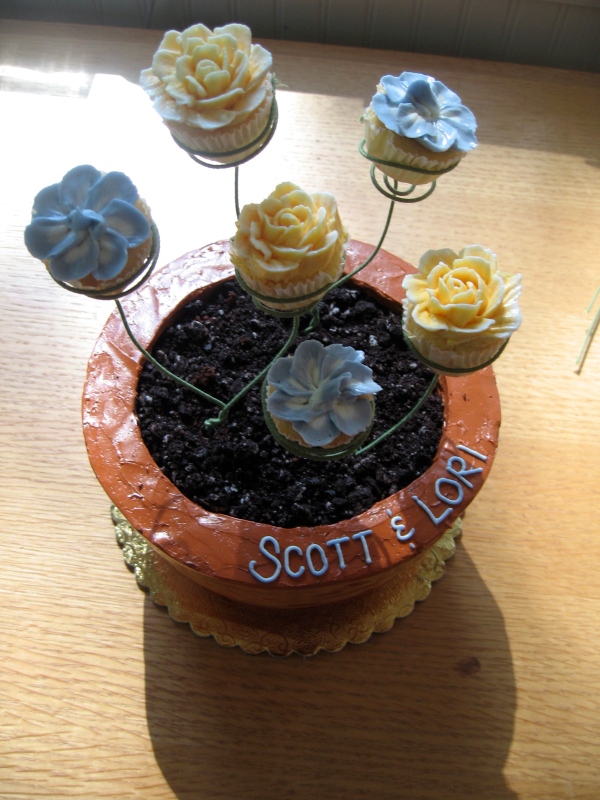
I trimmed the edges until they graded regularly, smoothed the sides with more ganache and stuck three plastic straws straight down the center in a triangle formation to function as dowels, trimming the excess with a pair of scissors. I then placed another cardboard round on the top of the cake and then, holding both ends securely, I flipped the entire cake over so that it tapered downwards, like a proper pot. I then took the reserved 1/2 7-inch cake round, and cut a circle into it, using a cake ring, in order to create the lip of the pot. I secured it with more ganache, and presto! Pot shape achieved.
For Phase two, I took some of the Italian buttercream that I had made en masse beforehand, and tinted it terra cotta-colored, with mostly red and yellow, some green and a touch of blue. I then smoothed it over the chocolate cake in two layers — the first to keep the crumbs in place (fridged it for about 10 minutes before moving on to the second layer) and the second to be the pot surface. I used a straight palette knife and let it be rustic with visible irregularities and swipes by dragging the palette tip across the top and sides — it is supposed to be a clay pot after all.
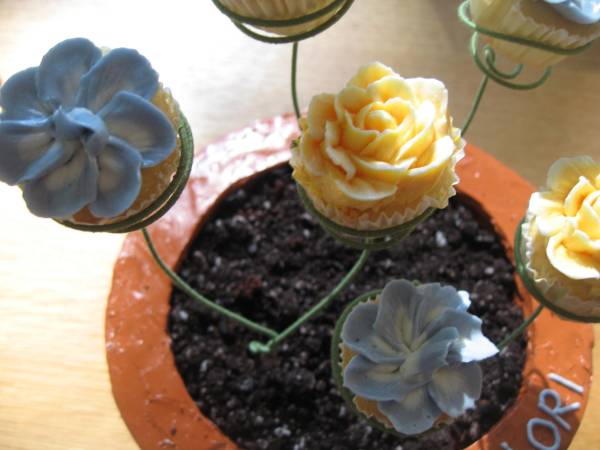
To make the stems, I used some floral wire that I corkscrewed at the top to provide support for the cupcake flowers. This is the tricky part: If you should ever wish to make a cake like this, corkscrew the wire before shoving it into the cake. Also, twist at least two wires together at the bottom to not only make it seem more plant like, but also to give it some additional support. Finally, make sure NOT to stick the floral wire straight into the cake. Nobody wants wire (albeit cloth-covered wire) touching the cake that they are about to ingest. I made sure that the wires were stuck into the straw dowels (aha…it all comes together) so that the wire would not be touching any part of the cake that was to be consumed.
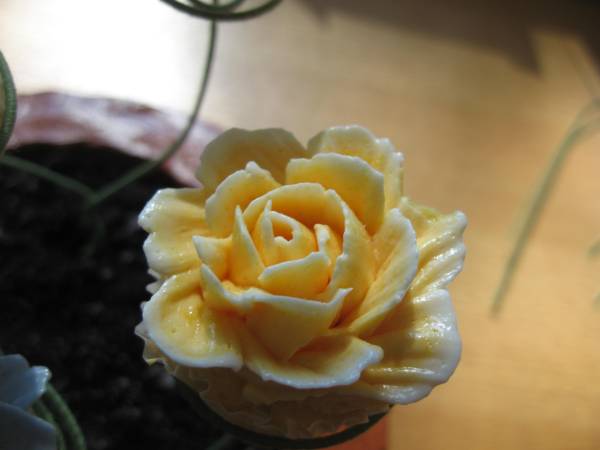
I used more of the Italian buttercream, tinted with yellow and blue, respectively, to make the flower buds. There are a lot of awesome videos out on the web on how to make buttercream flowers, so I will not take the time to do it here, now. (Plus, this post is already astronomically long.) Finally, the soil (pretty much my favorite part of this whole cake) is made up of crushed up Oreos. Some people use rolling pins, some people use food processors; I used my fingers, and suggest that you do too, because it is remarkably satisfying.
Go now! Crush some Oreos…only make sure they’re relatively fresh, otherwise your hands will hurt a lot.
Up next, some tarts.
Alright. First things first, I lied about the celebration cake. Not about its existence entirely, because it was, and was consumed, but I did lie about it being the next post. It shall be next-next.
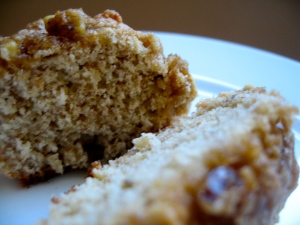
And in case you hadn’t picked it up from the title, this post is about bananas! More precisely, Banana-Streusel Muffins.
You see, there is an overabundance of overripe bananas in my apartment at all times. This comes from an error in figuring out the relationship between the number of bananas bought, rate of banana decay, and number of bananas (likely to be) consumed. And these terrible miscalculations result in the spawning of fruit flies. I loathe fruit flies. In case you live in the Arctic, and have never encountered a fruit fly, this is what a typical fruit fly looks like:
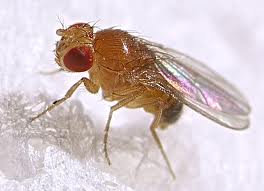 Way less tasty looking than muffins.
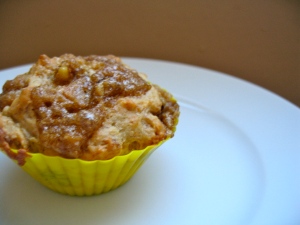
To reduce fruit fly populations in my kitchen, I have been peeling and freezing excess bananas at the height of ripeness to combat the speed with which the fruit flies can multiply (I shall triumph over exponential growth!) As such, the banana situation gets a little out of control, and I find myself leafing through cookbooks, desperately trying to not do banana bread, again. I had been thinking of doing a banana cookie (anybody have a favorite recipe?), but had recently been given some sweet silicone muffin cups, so I decided to take them for a test run and simultaneously free up half of my freezer space.
I modeled this recipe on Mark Bittman’s How to Cook Everything, taking the base recipe of “Muffins, Infinite Ways” and combining the Banana-Nut variation with the Coffee Cake variation and adding my own various tweaks, mostly hinging on what happened to be in my cabinets the day I made these.
Banana-Streusel Muffins
- 3 tablespoons olive oil
- 2 cups all-purpose flour
- 1/4 cup honey
- 1/2 teaspoon salt
- 3 teaspoons baking powder
- 1 egg
- 1/4 cup milk
- 1 cup smashed bananas
- 1/4 cup chopped nuts (I used the ancient walnuts at the back of my fridge)
- 1/2 cup brown sugar
- 1/2 teaspoon nutmeg (or cinnamon, or whatever)
- 2 tablespoons melted butter
Heat the oven to 375*F. Grease a 12-cup muffin tin (or if you have the handy dandy silicone cups, just let them hang out on a baking sheet).
Sift the dry ingredients together in a bowl. Add chopped nuts to the dry ingredients. Beat the egg, milk, oil, honey, and bananas in another bowl. Make a well in the center of the dry, and pour the wet ingredients into it. Use a large wooden spoon (as large, and as old, and as curry stained as you can find), and combine the ingredients briskly; stir and fold, don’t beat! Stop as soon as there are no more dry streaks, or else. The batter should be lumpy and thick.
Mix together the brown sugar, nutmeg and butter (streusel mixture). Add batter to the muffin tins, filling 1/3 full. Add streusel mixture over top the batter (1-2 tablespoons, or until batter is well covered). Add batter over top the first streusel layer to the muffin tins, filling to 2/3 fullness. Add streusel mixture again, to the top off each muffin.
Bake for about 20 minutes, or until golden brown and a toothpick or cake tester or kebab skewer comes out mostly clean. (A few crumbs clinging is usually fine.) Remove from the oven and let rest for 5 minutes before taking out of tins.
Up next, celebrations and cakes, I promise.
A cookie parade
There is never a time when I do not feel like eating a cookie.
Let me rephrase. There is never a time in my life when there is not a cookie I could be eating…as in it could be Thanksgiving, and I’ve just gorged myself on turkey, stuffing, rolls, green beans, pumpkin pie (one of my insatiable cravings…more on that later), and still — still, there will be a cookie I want to eat. Probably something quintessentially un-November, like a lemon bar, but if a platter full of lemon bars should magically appear, I would eat at least three. And then probably eat more pumpkin pie.
That’s what I love about cookies — they are truly versatile, and everyone loves some form of cookie or another. I have never EVER heard anyone say that they hate all cookies, no matter what. And if someone were to say that, they would be wrong. Of course they like cookies; they probably love cookies, they just haven’t eaten the right kind yet. In fact, I would go so far as to say that most of the time people have their favorites that they will stand by until Apocalypse comes: the classic chocolate-chip, the buttery shortbread, the reliable peanut-butter, the spicy ginger-molasses. (I am, in case you were wondering, spicy.) The problem with having a favorite cookie, however, is that you can often get stuck in a rut. People who love chocolate-chip, always get chocolate-chip. And they always request chocolate-chip, and will often only eat chocolate-chip, or some relative of their old stand-by, like peanut-butter-chocolate-chip.
So when my sister asked if I could bake some cookies for her co-workers on a recent trip to LA, I immediately thought, “What kind of new, exciting cookies can I expose all of these people to? What sugar-coated worlds could I rock for these folks?” I wanted cookies that were different, yet familiar. Elegant, but not fussy. Rich, but not cloying. And so I turned to Smitten Kitchen.
I wax lyrical/crazy obsessive fan when I talk about Smitten Kitchen to people I know in real life, so I will spare you my effusions (but oh my god I LOVE her blog!!!). After consulting my sister, I decided upon the butter heavy trifecta of Pecan Sandies, Austrian Raspberry Shortbread, and World Peace a.k.a Korova Cookies. Needless to say, worlds were rocked.
PECAN SANDIES (Smitten Kitchen version found here)
My sister actually insisted (in a very non-insistent way) upon me baking these. I think that it was mostly an aesthetic decision because she liked the way that they looked like little edible square buttons on SK’s blog. I fully support any decision based on aesthetics alone, so I went along with it, and was thrilled with the buttery-rich-toasty flavor.
1 cup raw pecans
2 cups all-purpose flour
1 cup (2 sticks) unsalted butter, softened
2/3 cup powdered sugar
2 teaspoons vanilla extract
1 teaspoon salt
1/2 teaspoon baking powder
2 tablespoons coarse grain sugar (raw, sanding, etc)
Preheat the oven to 350 degrees F. Spread the nuts out on a baking sheet and bake them until they are well browned, 10 to 13 minutes (give the pan a little shake every couple of minute for even toastage). Cool pan on wire rack.
In a food processor, grind the nuts with 1/4 cup of the flour. Set aside.
Using an electric mixer, beat the butter and sugar until creamy and smooth, about 2 minutes. Add the vanilla and beat well. Sift together the remaining 1 3/4 cups of flour, the salt, and the baking powder, and add it to the dough, mixing until just combined. Stir in the nut mixture. Form the dough into a square, wrap in plastic wrap, and chill for at least 3 hours.
Preheat the oven to 325 degrees F. Roll the dough between two sheets of wax paper to 3/16 inch thick (a rectangle approximately 10 x 14 inches). Using a sharp knife and a ruler, cut the dough into 1-inch squares. Sprinkle the cookies with the coarse grain sugar. Place them 1 inch apart on ungreased cookie sheets (do not reroll the scraps, but definitely bake them and eat them yourself — testers!). Prick the cookies with a fork and bake until pale-medium-golden all over, about 10 to 12 minutes. Cool on a wire rack.
AUSTRIAN RASPBERRY SHORTBREAD (Smitten Kitchen version found here)
Like SK, I was intrigued with the process of these bar cookies (grated dough, whoo hoo!), and was surprised to find that they were the Big Hit at the office. I thought they were very very good, if a little on the sweet side, but my heart belongs to the World Peace Cookies.
1 pound (4 sticks) unsalted butter, slightly softened
4 egg yolks
2 cups granulated sugar
4 cups all-purpose flour
2 teaspoons baking powder
1/4 teaspoon salt
Optional additions: 1 teaspoon vanilla extract or 1 teaspoon lemon zest
1 cup raspberry jam, at room temperature
1/4 cup confectioners’ sugar
Cream the butter with an electric mixer until soft and fluffy. Add the egg yolks and mix well.
Sift the granulated sugar, flour, baking powder, and salt together. Add to the butter and egg yolk mixture and mix just until incorporated and the dough starts to come together. Turn the dough out onto a floured work surface and form into two balls. Wrap each ball in plastic wrap and freeze at least 2 hours or overnight (or as long as a month, if you like).
Heat the oven to 350 degrees.
Remove one ball of dough from the freezer and coarsely grate it by hand or with the grating disk in a food processor into the bottom of a 9×13-inch baking pan or a 10-inch tart pan with a removable bottom. Make sure the surface is covered evenly with shreds of dough.
With a piping bag with a wide tip or a zip-lock bag with the corner cut off, squeeze the jam over the surface as evenly as possible, to within 1/2 inch of the edge all the way around. Remove the remaining dough from the freezer and coarsely grate it over the entire surface.
Bake until lightly golden brown and the center no longer wiggles, 50 to 60 minutes. Wait 10 minutes, then dust lightly with confectioners’ sugar (I find when you dust immediately afterward, the heat and moisture of the cookie just soaks the sugar up).
Cool on a wire rack, then cut in the pan with a serrated knife. I find that for this an all bar cookies, chilling the pan in the fridge makes it a lot easier to get clean cuts.
WORLD PEACE COOKIES (Smitten Kitchen version found here)
These are my definite favorite of the three cookies…perfectly balanced chocolate-y flavor. The texture is heavenly and the cookie itself is so irresistible that the first time I made these, my boyfriend and I ate the entire batch within one evening. It was amazing.
1 1/4 cups (175 grams) all-purpose flour
1/3 cup (30 grams) unsweetened cocoa powder
1/2 teaspoon baking soda
1 stick plus 3 tablespoons (11 tablespoons or 150 grams) unsalted butter, at room temperature
2/3 cup (120 grams) (packed) brown sugar
1/4 cup (50 grams) sugar
1/2 teaspoon fleur de sel or 1/4 teaspoon fine sea salt
1 teaspoon vanilla extract
5 ounces (150 grams) bittersweet chocolate, chopped into chips, or a generous 3/4 cup store-bought mini chocolate chips
Sift the flour, cocoa and baking soda together.
Working with an electric mixer, beat the butter on medium speed until soft and creamy. Add both sugars, the salt and vanilla extract and beat for 2 minutes more.
Turn off the mixer. Pour in the flour and very carefully pulse the mixer at low speed about 5 times, a second or two each time. If there is still a lot of flour on the surface of the dough, pulse a couple of times more; if not, continue at low speed and mix for about 30 seconds more, just until the flour disappears into the dough — for the best texture, work the dough as little as possible once the flour is added, and don’t be concerned if the dough looks a little crumbly. Toss in the chocolate pieces and mix only to incorporate.
Turn the dough out onto a work surface, gather it together and divide it in half. Working with one half at a time, shape the dough into logs that are 1 1/2 inches in diameter. Wrap the logs in plastic wrap and refrigerate them for at least 3 hours. (The dough can be refrigerated for up to 3 days or frozen for up to 2 months. If you’ve frozen the dough, you needn’t defrost it before baking — just slice the logs into cookies and bake the cookies 1 minute longer. Also be aware that cutting frozen dough is like trying to cut through cement — use a super sharp knife and apply firm but controlled pressure. Be aware that crackage will most likely occur.)
Getting ready to bake: Center a rack in the oven and preheat the oven to 325°F (160°C). Line two baking sheets with parchment or silicone mats.
Working with a sharp thin knife, slice the logs into rounds that are 1/2 inch thick. (The rounds are likely to crack as you’re cutting them — don’t be concerned, just squeeze the bits back onto each cookie.) Arrange the rounds on the baking sheets, leaving about one inch between them.
Bake the cookies one sheet at a time for 12 minutes, no more, no less. Transfer the baking sheet to a cooling rack.
Do ahead: Packed airtight, cookies will keep at room temperature for up to 3 days; they can be frozen for up to 2 months. They can also be frozen in log form for months, and can be sliced and baked directly from the freezer, adding a coupld minutes to the baking time.
Up next, a multipurpose family celebration (with cake, of course!)
Pre-post post
For some reason, I have been absurdly afraid of officially starting this blog — mostly for reasons of accountability. I know that once I start writing, I’ll want to try to have something new to put up every week, and my schedule in terms of work and school have been challenging, to say the least.
However, after building this blog at least 3 (ok, maybe 6) months ago, to stop by and stare approvingly at the blank screen before moving onto some much more rewarding pursuit (like Facebook), I have decided to write this pre-post to lessen the massive pressure of the first post. I know, I know, it’s all in my head, and this blog is so new, and so unformed, no one’s reading the first post anyways, but to me, the first post is representative of the blog, and the essence of what the blog is trying to accomplish. Apparently, from the way this is going, my blog is attempting to accomplish convoluted-ness and lack of direction.
But that stops now! This blog is about baking! And decorating things that have been baked! And interesting facts and stories tied to things that have been baked, and things that decorate the baked things!
Up next, a cookie parade.
